Tuesday, June 17, 2014

3 weeks after the installation - quite a storm with 80km winds...

For those who followed this blog till now, 3 weeks after the installation we had quite some storm this afternoon. About 18mm of rain in 20 minutes and winds and gusts up to 80km per hour.

When I saw the storm coming I was concerned. Look at the video below:
The bottom of the mast was resting on a 2x4 and the wind managed to slowly walk the mast off the 2x4 and bend the top and the bottom chimney mount brackets. I am not surprised, the antenna is quite heavy, the bottom mast is a 1.5" schedule 40, which is quite heavy.

At the end of the storm this is how the antenna looks like:
you can see it is leaning over the left. Hopefully it will stand over the next day or so till I weld up a much stronger chimney mount.
 
The idea is to get some 1" metal square tubes and weld them together to resemble the below design:
 
As you can see this will have 3 brackets, one on the bottom to make sure the bottom cannot slide out from it's position. For this we will weld a smaller pipe piece on the top of the bottom mount ant the mast will be inserted onto that.

 
The middle piece is shown a bit lower here, the exact location of that will be determined later.

Each end is overflowing the chimney with about 1-2 inches to allow me to drill a hole though which the screws on the end of the steel band will hold the assembly to the chimney.
 
Tomorrow I will have to measure the exact size of the chimney even though it is not critical, but I will prepare the brackets as designed by welding them together.


Saturday, May 31, 2014

Part 5 - 6 band hexabeam antenna construction

Installation and final testing

Of course the toughest job in an antenna building is always the installation. I am scared of falling - so you will not see me too often on the rooftop. I will climb there and do what needs to be done, but my shaking knees are a noise hazard and danger to me and everybody else.

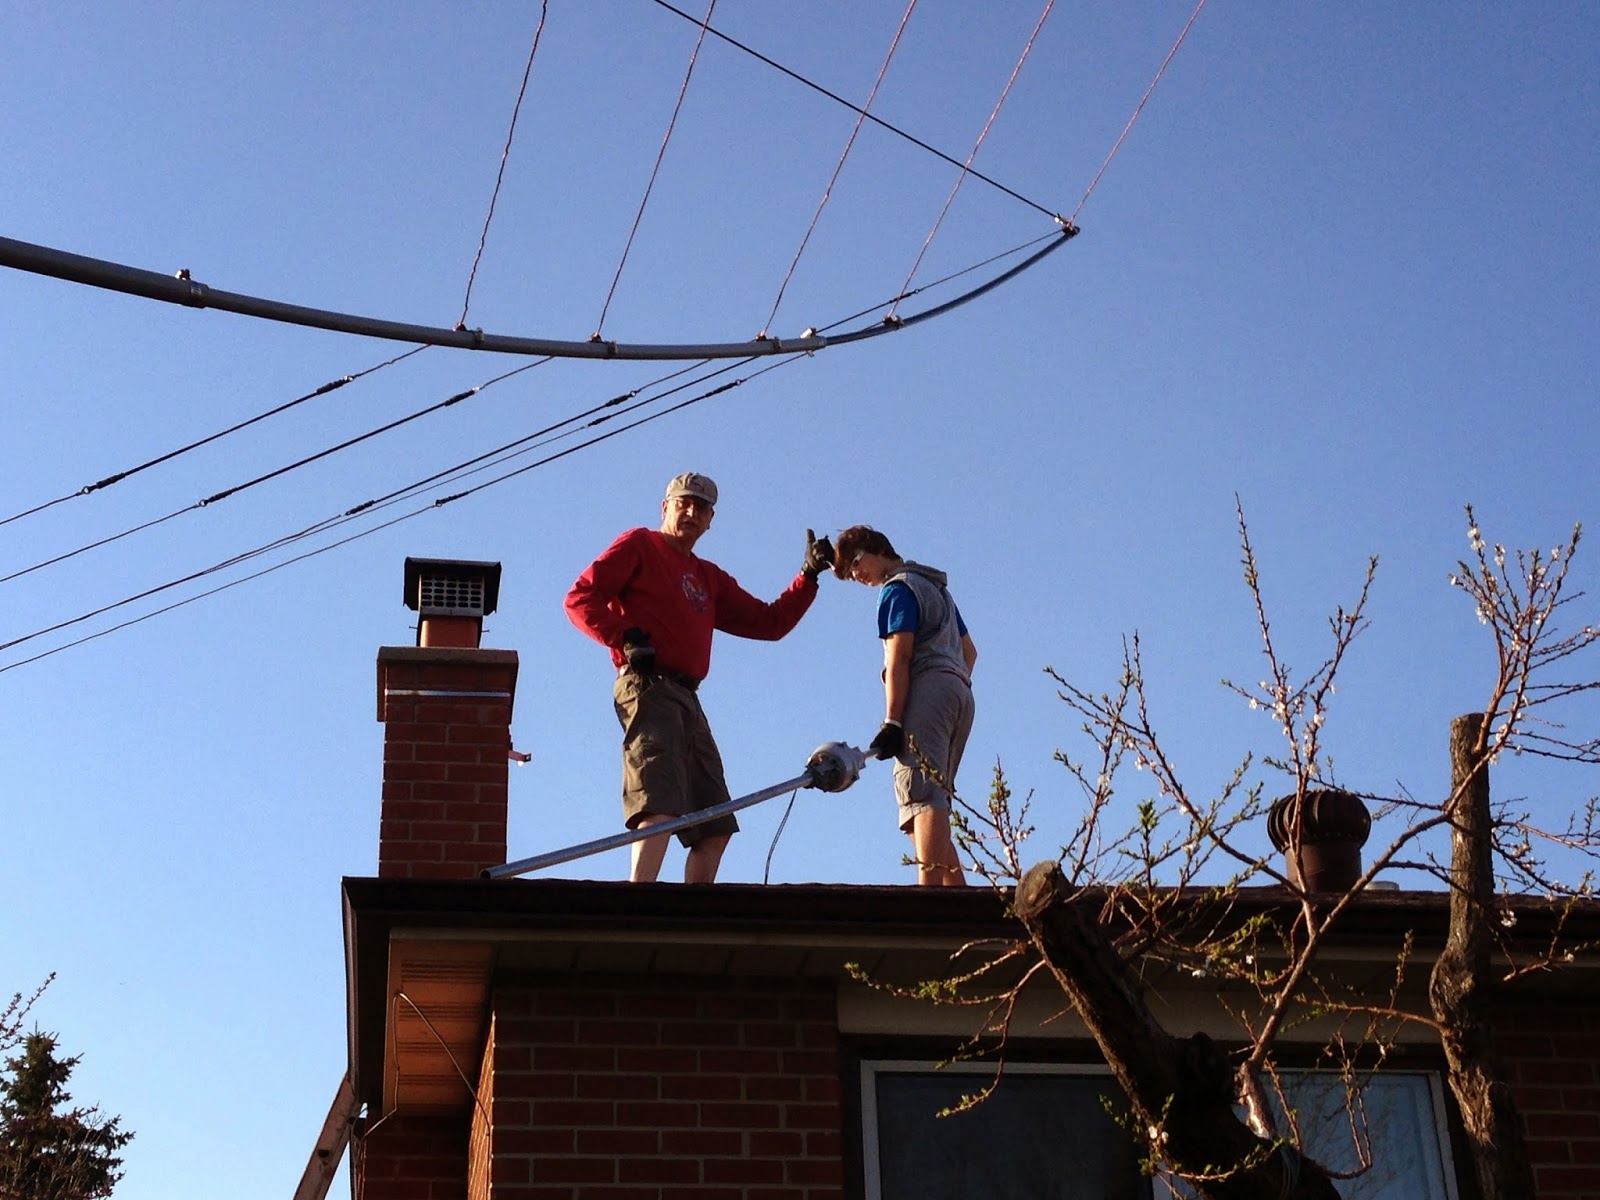
Generously - Mike (VA3MW) who supervised this antenna project from the beginning, very often giving valuable advices and tips, offered to help installing the antenna up on the rooftop, strapped to my chimney.

Of course even before that we went ahead and purchased an antenna rotor with a controller box (Hygain CD 45 II) which looks a bit like my grandmothers 60 year old radio use to look - but after a bit of cleanup and tune-up I still seems to do the job better than many modern devices built to last a year only. This thing has been in use for 20 plus years and still kicking!

I preinstalled some of the thing before Mike got here, and I made sure all screws, cables, connectors are all in their proper place so we literally just have to lift it up on the rooftop, screw it down, plug it in and it would be ready to use.

We were a bit concerned about bringing a 6m diameter antenna up on a ladder because of all the bushes and trees around the house, but at the end it turned out to be easier than we thought.


Antenna on the side ready to be lifted to the rooftop


Mike pulling the antenna up

Preparing to install te uper antenna mast

Installation and securing the wires, cables and grounding

Installation and securing the wires, cables and grounding

Installation and securing the wires, cables and grounding

View from the park beside my house - and the S9V43 vertical righ beside it

The birds already like the new resting place
I had the antenna up for 2 weeks and I have been making contact like crazy. Previously never heard countries like Israel, Lebanon all of a sudden came up on 20 meters at night. Since my vertical can do 20 meters as well, I often compared the 2 signals, and tested transmitting on both to various stations all over the world. The final verdict always comes back the same, they hear me about 5-7 units better with the hexbeam compared to the vertical. In most cases when I am receiving other stations, the hexbeam is a good 2-3 units quieter compared to the noisy vertical.
 
After 2 weeks I got tired of manually rotating the hexbeam. I purchased a so called Easy Rotor Control - USB version 4 kit. With this kit I can integrate the rotor into HDR and rotate the antenna to the direction of the remote station with a single click.
 
While in the case of the Hygain CD 45II there is not much space, I cut a small hole on the side so the USB and power connectors fit through and I screwed the control circuit inside the box, making it a complex small unit:
 
 The above picture was taken while I was wiring the circuit to the inside of the Hygain CD 45 II. This shows how clean this installation really is.

If all works well, here is how it should rotate:

 
After all this and making 10 plus contacts almost every night on 20 and 17 meters, I also worked several people on PSK31. When working on PSK31 I usually drop the power down to 25W or less, depending on where the contact station is, but with 25W I can work the whole world.

One of the past nights I fired up the WSPR (see what that is in my previous blog post), dropped the power to 5W and left it on for the night. After 6 hours I had quite a few contacts made see the propagation map below:

In the near future I will need Mike (VA3MW) back to replace the lower mast, as that is slightly bent and it really bothers my eye. I already purchased the replacement mast. I rustproofed it and at the end painted it in black matte. This picture was taken after the rust proofing primer coat was applied to it. This is a schedule 40 1 1/4 inch pipe which should withstand most of what the weather can throw at it here in Ontario.
This concludes the blog around the hexabeam antenna build, assembly and installation. I hope it gave you a good read as well good resources if you wish to build yours.
 
And of course this blog would not be complete without a final aerial view of the hexabeam antenna:


Part 4 - 6 band hexabeam antenna construction

Final touches and assembly


This is where it all comes together. If you have done your shopping correctly, the antenna is ready for the final assembly. All you need now is a space of about 10 square meters with a post in the middle so you can install the spreaders and wires.

The painful construction part was assembling the wire sets. Each of these has 5 pieces (driver, tip space, reflector, tip space , driver), and has to be measured very carefully. The HEXROPE kit mentioned in the shopping list (previous post) has enough wire for a 6 band antenna. To make the wire kits I purchased some 1/8 aluminum sleeves and used those to hold the rope ends and cable ends together. The tool to crimp these (75CAD) had to be also purchased since the 4mm aluminum sleeves will not bend easily.
I spent a good 2-3 hours of measuring and building the wire sets. On the living room floor, with a measuring tape, measuring every set twice before cutting the wire - it almost paid off. At the end when it all went up in the air and we measured it all bands except 6m and 12m were resonating where it should be, while the above too seem to be a bit too short and resonating higher than expected.

 Once you have the cable sets, the rest is a walk in the park. Literally. You need to walk around the antenna several circles to assemble all cable sets. See the time lapse video below:
As you can see there has to be enough space to assemble it as the antenna has a diameter of about 6 meters. After assembly we raised it a bit higher to about 2.5 meters from the ground and gave it a try. Even from this elevation I could hear certain station much better and what we did not expect - that I was able to make a contact with a Hungarian station on 20 meters right away. Even though we speak Hungarian and you won't understand it, you can hear the quality of the incoming signal pretty clearly:
The antenna at this point was not higher than 2.5m from the ground. The next few days we spent listening on different bands and when Mike (VA3MW) had a moment he came over the measure the antenna with an analyzer.
 
The below picture are from the readings taken 2.5m off the ground. Some SWR reading may seem to be alarming, rest assured when we lifted the antenna above the chimney all these went below 1.5. Some of the elements are resonating a bit off band, those will be dealt with later:
 

Monday, May 12, 2014

Part 3 - 6 band hexabeam antenna construction

Shopping list


After ample research I came to conclusion that I will follow the K4KIO's recommended shopping list as closely as I can, with the exception of translating this to items available mostly from local hardware stores.

Here is a link to the original parts list:

http://www.leoshoemaker.com/hexbeambyk4kio/broadhexparts.html

As you can see on the above link this list is divided in 5 separate parts, I will go though most of these and give a little explanation.

Base Plate Parts:

- Base plate: - I've got a big enough 5mm aluminum plate from the Woodbridge location of Metal Supermarkets. I made sure that the aluminum is 6061-T6 or similar to make sure has enough strength to hold the spreaders. I do not recall the price, but it was around tens of dollars. Once I got it home I measured the required hexa shape, marked the parts which need to be cut away and I used a portable skill saw to cut away the extra pieces. Since I already had my floor flange I marked the holes up as well and drilled them out, so I finished with the plate in less than 2 hours.


 - U bolts: I got these from a local Canadian Tire store, I might had to go to 2 different locations to get the required 12 pieces.
- Nylon nuts: I used standard 1/4x20 nuts on the U bolts.
- Floor flange: For days and days I searched for a good size, but the ones which came back as the result were either expensive or too far away. At the end I decided to order a few of the ones I found on eBay: Hollaender 45-6 Square FloorFlange Aluminum Magnesium 1" IPS (1.38" ID) This looked like one which will hold up to the extreme temperatures here and would be thick enough to hold all things together.
- Mounting Bolts, Nuts and lock washer: These were all 1/4 or 5/16 inch as required. I did not keep a clean track of what came from where, since I had many of these available in my shop already. MAin source was however a local Home Depot store.

Spreader parts

- Fibreglass tube 1"x48", 3/4 x 48", 1/2 x 48": I saved myself from trouble and I purchased the spreader kit from: http://www.mgs4u.com/hexbeam-kit.htm. I chose the HEXKIT2 and also ordered the HEXROPE2 and HEXWIRE3 sets to complete all the wiring and roping. This set me back with about 200+ dollars with shipping, but it was well worth it, the fibreglass tubes slide in very nicely and it was a breeze to make the 6 spreaders.
- Medium Hose Clamp, small hose clamps: I got these from the local Home Depot store.
- P Clips: I actually had hard time finding these, as in Canada these seem to go under a different name. Finally I found them in a local Home Depot Store, now I am just hoping these will hold up outdoors for a while:


3/8 seems to be the right size to fit all the spreaders. You need several bags of these make sure you have some extra pieces because these clamps can break easily.

Wire Set Parts

- Antenna Wire, Cord: these were purchased above from http://www.mgs4u.com/ as kits HEXROPE2 and HEXWIRE3.
- Lugs: You can get these from Home Depot, Canadian Tire or even better if you have a SAYAL store around you.

Support Cord Parts

- Cord: this is part of the HEXROPE3 kit above, already purchased
- Hooks: I've got the stainless steel open S hooks from Canadian Tire, I had to go to two different stores to get all the required quantity.
- Cable tie: I used minimal amount (none) on  the antenna installation


 Center Post Parts


- Main Tube: This is part of the HEXKIT2 above, as a matter of fact they send you 2 pieces, so you have one spare.
- Cap: I've got this from Home Depot, took me a while to find the right size.
- Euro terminals: I did not use these. Instead I drilled holes in the main post and pulled the screws through. See the picture below. I will detail the "how to" in the next post.

 - Mach screws: I've got the screws for the main post from Sayal. Supposedly these are stainless steel, but I am guessing they are made in china because 2 weeks in the outdoors and you are already seeing spots of rust. We'll keep them for now and if they rust we will replace them as required.

Items not on the K4KIO list:


- Wooden dowels. I got some dowels inserted in the fibreglass tubes which are held down by the U clamps to the base plate to avoid the fibreglass to be crushed by the U bolts.
- Brush-On electrical tape. I got this from Princess Auto, the red coating on the picture above is done with this.
- different length 1/4 x 20 screws. Since I got my rotator used I needed some extra screws to assemble it to the main mast as well some long 3.5" screws for going through the mast and the flange to avoid unwanted rotation.

If you use a rotator you will need some rotator cable as well, I got a roll of 30 meter 6 wire 22 gauge cable from Sayal together with a roll of 30 meter 2 wire 18 gauge cable. Lucky I was foreseeing that this might not be long enough, I bought 2 more rolls the same only 10 meter long.

Like in a Murphy's rule the cable ended exactly at where it would enter the house. The 30 meter roll was just 6ft short :)


Thursday, December 12, 2013

Part 2 - 6 band hexbeam antenna construction

Research


Like with any projects I do I do a very serious research to see what am I dealing with. I cannot simply jump into a project and "go with the flow", I have to understand and control the process from the beginning to the end.

Google is your friend. As they say you can find on Google everything about everything these days. I remember the days when we paid big bucks to have fancy encyclopedias on the shelf. My parents had a huge library, my father collected several engineering books in 3 different languages. By now all those are outdated and not worth anything. In 50 years not only the world turned around, but all the professions engineering changed so much that what I studied 27 years ago now is almost irrelevant. But Goggle has answers for everything.

So I started searching, reading, searching, and reading more. I right away cam across of two excellent resources:

A very good collection of resources:
http://www.karinya.net/g3txq/hexbeam/

The designer of the broadband hexa beam antenna:
http://www.leoshoemaker.com/hexbeambyk4kio/general.html

A European site with a very nice design and lots of installation videos:
http://www.g3txq-hexbeam.com/

Beside these I jumped on youtube as well and searched for videos demonstrating how the antenna works and how it all comes together.

With the help of my trustee mentor Mike (VA3MW) we decided that we will do the following:

- I will build a hexa beam for 6 bands: 6m, 10m, 12m, 15m, 17m and 20m bands.
- Mike will help me mount it on to my chimney to replace the existing IMAX2000 10 meter antenna.
- Beside the antenna, antenna parts and feed-line we will need an antenna rotor, a rotor controller and we will need abut 120 feet of antenna rotor cable as well.

I was debating on buying a complete antenna kit for close to 700 dollars plus shipping, handling and taxes - or I can get the parts and build it myself. Looking at the available budget for this project the second option seem to give me more financial room. At the end I will still probably spend around 700, but that should be the whole cost including the rotor and the mounts.

So here we are, we started ordering parts for this project. The next section will specify what and from where.


Part 1 - 6 band hexbeam antenna construction

Introduction.

After the November ARRL Sweepstakes I was discussing my contest results with my friend Mike (VA3MW). As you saw in my previous article, I only have 2 vertical antennas, one for 10 meter and the other in the backyard for 10 through 160 meters. Of course I am and always been aware of the limitations of the vertical antennas, and the noise floor associated with it. Even with that I think I did good on the different contests till now, I entered in the rookie category. However we've been discussing on what solution we might be able to come up with, which can satisfy the need for directivity, small footprint and great performance.

Mike says we have real estate to work with as I have a backyard of 32.5 x 32.5 ft., but I do not want to put up a tower at this time, we can only work with about 30-35ft above ground level.

One idea was to run a cable on the park beside my house on the top of the trees,  and put a a big horizontal receiving loop, but at this time I have not found yet any reliable design I can work with on that perspective.

I have a Kenwood TS-590 radio which can accommodate a separate receiving antenna beside the 2 main antennas connected for transmission. I was thinking of connecting a big receiving loop to that port. However one day Mike came up with a better idea - he said I need a hexbeam antenna.

This grabbed my attention and with his direction I started researching the subject. When I saw the first few pictures of this antenna, I right away knew that this is doable, and this most likely will be my next antenna construction.

So I started researching, reading, researching more and more till at the end I had all pieces coming together in my mind.

I am not sure how you work, but for me to start a project like this I have to have a vision on how every single piece will fall into place. If something is not clear or not clarified, I cannot start. I can only start to build if all parts, resources are clarified and either have been purchased - or are on the way. I hate half built things which sit in your garage for years waiting for a part - and after the part arrived waiting for you to start over again. The big problem with these projects is that most likely will never get finished, and at the end they end up in the garbage because there is no use for them any longer after a few years.

So, I started looking up the parts and purchasing them.

The following article will talk about the resources, parts, costs, etc.


Thursday, December 5, 2013

Multi-band vertical antenna (S9V43) installation

This has been done about a year ago, but I though I will post it on this blog, since it is HAM radio related.

After I purchased my Kenwood TS-590 station in 2012,  originally had only an IMAX 2000 antenna installed on the rooftop - strapped to my chimney. While this worked well on 10 meter (28MHz band) and on 12 meter, as soon as I started using it on upper bands it was clear that it will not perform well. This is after all a CB (Civil Band) antenna. I guess I was lucky as when I installed this antenna the 10 meter band was open and for about a month or two I was able to make lots of contacts. THen the band closed and I had to move to other bands - where my antenna was not performing as well as I wanted.

Due to the small space available in my backyard - I have a shed on a 32.5 x 32.5 ft backyard all antennas which require high towers, or more real estate like dipoles, inverted V's were out of question. The only thing I could opt for was another vertical, this time a 43ft long multi-band vertical from LDG Electronics. The selected antenna was the S9V43 antenna. This not only required minimal real estate for installation, but it has a green telescopic mast which very well is hidden in the neighborhood, so it does not attract unwanted attention from the neighbors.

Usually when I decide on something I do my homework. I spent days and days researching and learning about this antenna, how other do the installation, what are the best practices and of course what results one can expect from the antenna when it is properly installed.

I found a powerpoint document on the web created by Douglas Edmond Leach (VE3XK) who did a marvelous job on puling most of the data together about this vertical. The presentation can be fond here: Gound Mounted Verticals V10.

During the installation I followed most of his instructions and tried to make the installation as close to his as possible. The main difference that I have the antenna tuner built into my radio, so I did not use a remote antenna tuner as he did. For over a year now I was using this antenna in various competitions with variable results and luck. While I am happy with my results, I am not looking into replacing the IMAX 2000 antenna on the chimney with a much better multi-band hexa beam. That installation however will be detailed in another post.

For now I wanted to share the two videos related to the vertical antenna. The first, below is a time lapse video of the 2 days work I put into the installation of the S9V43 vertical antenna:


and the second video is an aerial video of these two antennas on my house and in my backyard:


I hope you enjoy these.